Managing the Zenoti Waitlist

Apr 05, 2022
 99
99
Managing the Zenoti Waitlist
Policy
- In order to manage the Zenoti Waitlist effectively, it must be looked at 1-3 times per day.
- When you look at the Waitlist, you are only looking at a list of Clients on the Waitlist for that specific date. You must look at a different day to see the Waitlist for that day.
- When a Waitlist entry has expired, we weren't able to accommodate the Client at their preferred date and time, the Front Desk should turn the Waitlist entry into a 'Turnaway'. This will help us understand the number of Clients we had to turnaway, the service types we are not able to accommodate, and much more.
Task
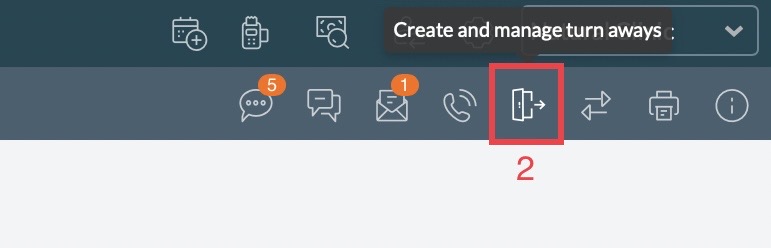
- In Zenoti, Navigate to the date for which you wish to look at the Waitlist. Select the 'Waitlist Icon'.
- In the Zeonti Appointment book, Select the 'Manage Waitlist' tab to view all Clients on the Waitlist for that date. From here you are able to edit the Clients request, book a Client whose appointment has become available, and turnaway the Client.
- To Book an appointment for a Client on the Waitlist, select 'Book' to the right of their name. This will populate the appointment panel with the Clients information and service type. The start time of the service will set to the current time. You can make any changes to the appointment here and select 'Save'.
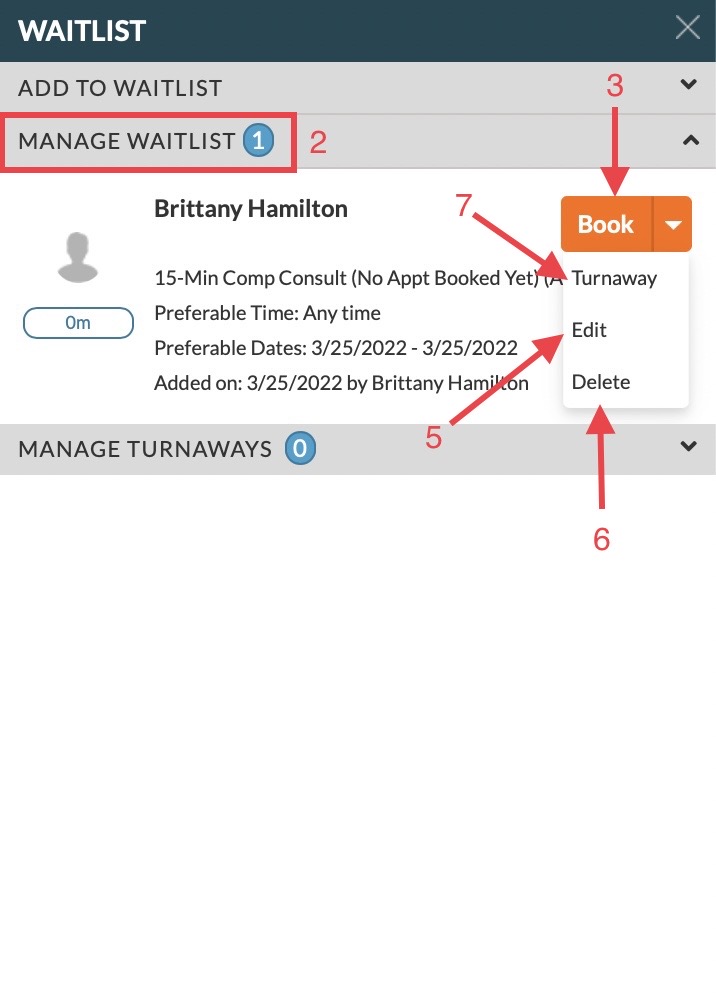
- Next to the 'Book' option you will see a downward arrow that brings a drop-down menu of options. From here you are able to edit, delete, and turnaway a Waitlist entry.
- The 'Edit' option allows you to change the service type, dates, and preferred appointment time.
- The 'Delete' option allows you to delete a Waitlist entry completely if a Client changed their mind or booked on a different day.
- The 'Turnaway' option allows us to track Waitlist entrys we were not able to accommodate. After you select the 'Turnaway' option you will then select the reason for the turnaway.
- The 'Manage Turnaways' tab allows us to see the Clients and service types we were not able to accomodate.

