How to Make a Client Note in Zenoti

Oct 11, 2023
 95
95
How to Make a Client Note in Zenoti
Policy
- All messages left with a client via voicemail, returned phone calls, thank you notes and esthetician follow-up calls are to be documented in the Guest Profile under "notes". Failure to document voicemail and important conversations may result in disciplinary action.
- Once a note is no longer relevant, it is to be deleted. This keeps our system clean and prevents possibly ignoring notes because too many become irrelevant.
- All notes must contain initials.
Task
When a team member leaves a message for a client or send a thank you note, this is to be document in the Zenoti Notes on the Guest Profile:
- Navigate to the Guest Profile by searching for the client in the top right corner of the appointment book or right click on the appointment and choose "Guest Profile" or "Profile"
- Click on "Notes" tab
- Click into the rectangular box to add your note
- Notes should be specific and avoid abbreviations
- All notes need to have initials
- Anytime we communicate with a client via voicemail, send a thank you card or postcard a Note should be made so the entire team can reference this
- If there is a special action the Front Desk needs to take upon checkin, checkout or when they call to book their next appointment a Guest Note should be added
- Notes can also be used by the Estheticians or MOD to communicate the above actions that need to be taken
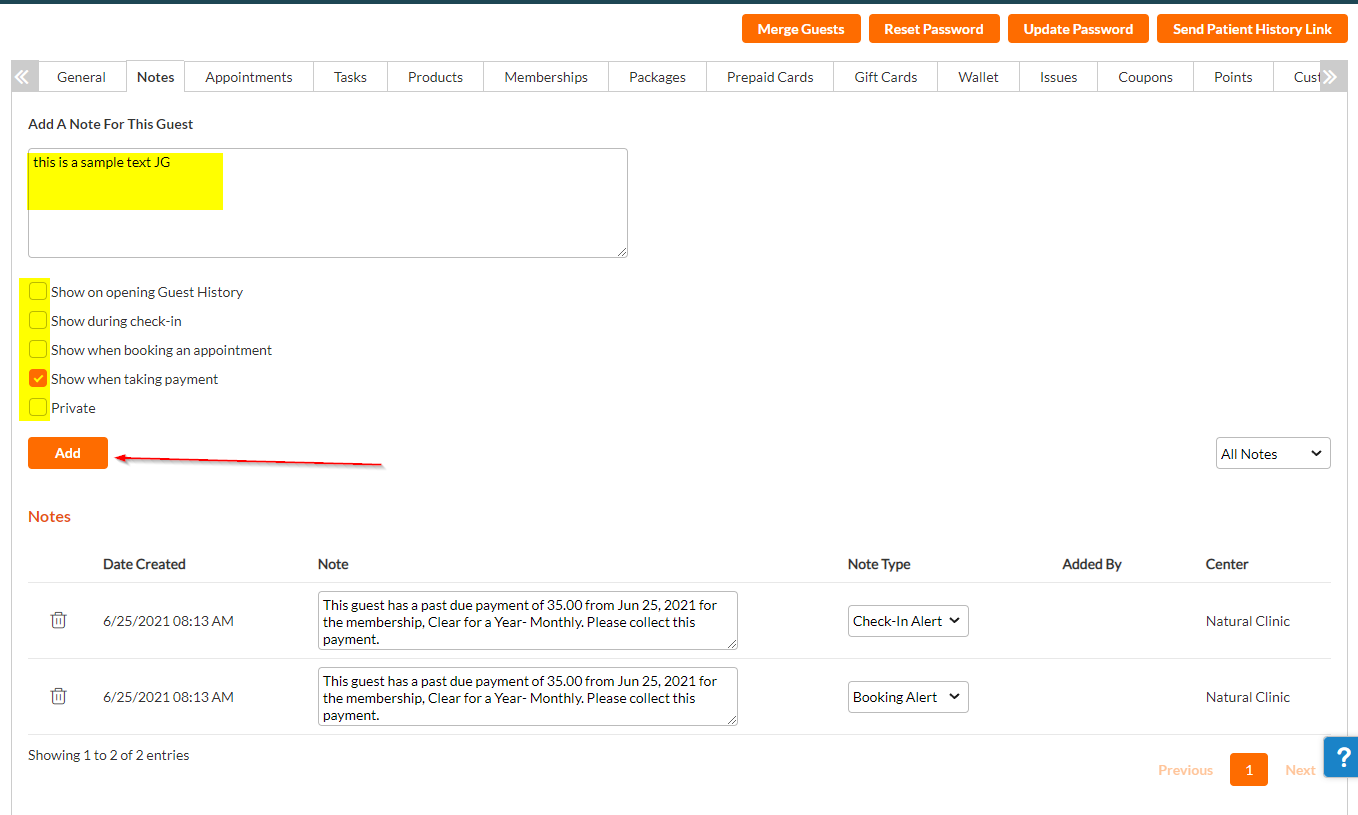
- Choose what kind of Note you would like this to be, you can choose from:
- Show on Opening Guest History
- Show during check-in
- Show when booking an appointment
- Show when taking payment
- Private (use if you do NOT want a pop-up and the note is only visible in the Notes tab)
- Click the "Add" button to save the Note
- After you add the note, it will show in the section below

