How to Check-In a Client

Mar 29, 2022
 340
340
HOW TO CHECK-IN A CLIENT
Policy:
- Clients are greeted warmly, with a smile and by name
- The FDC, is to take the time to memorize clients names
- ALL client information and paperwork is to be received and entered into Zenoti by the FDC prior to the client going back for their service. Here is the list of information and paperwork you are responsible for:
- Full name
- Full Address (entering dummy information is not acceptable)
- Referral
- Anniversary date (date of first visit)
- Cell Phone number
- Birthday
- Patient History
- Consent forms
- If an address and guest information is not collect by the FDC, this may result in disciplinary action. It required by law, that we collect all guest details.
- The FDC is responsible for collecting all Consent Forms for booked services prior to the appointment
Task:
- Warmly greet Client by name (See 'Greeting Client')
- Navigate to Zenoti, right click on the appointment from the Appointment Book screen and click "Change Status" and "Check-in"
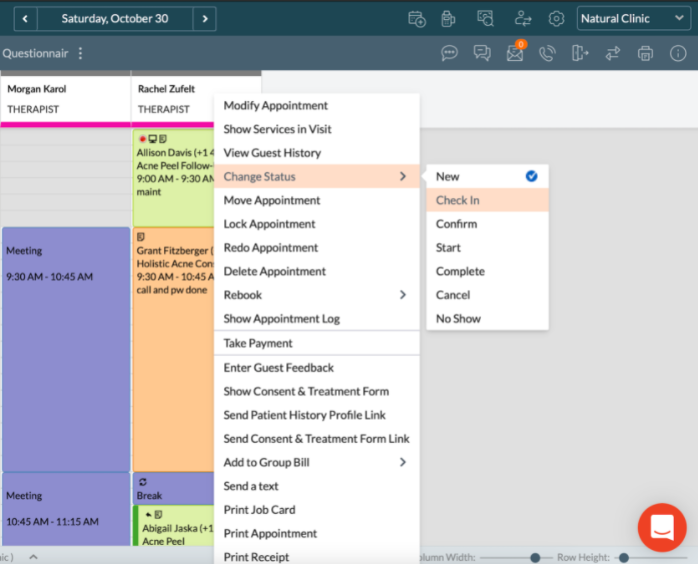
- Next, you will need to check for completed address and other client info. Navigate to "View Guest History" then check the following:
- GENERAL tab has all yellow fields completed an no dummy information (ie 000 in the address1 field)
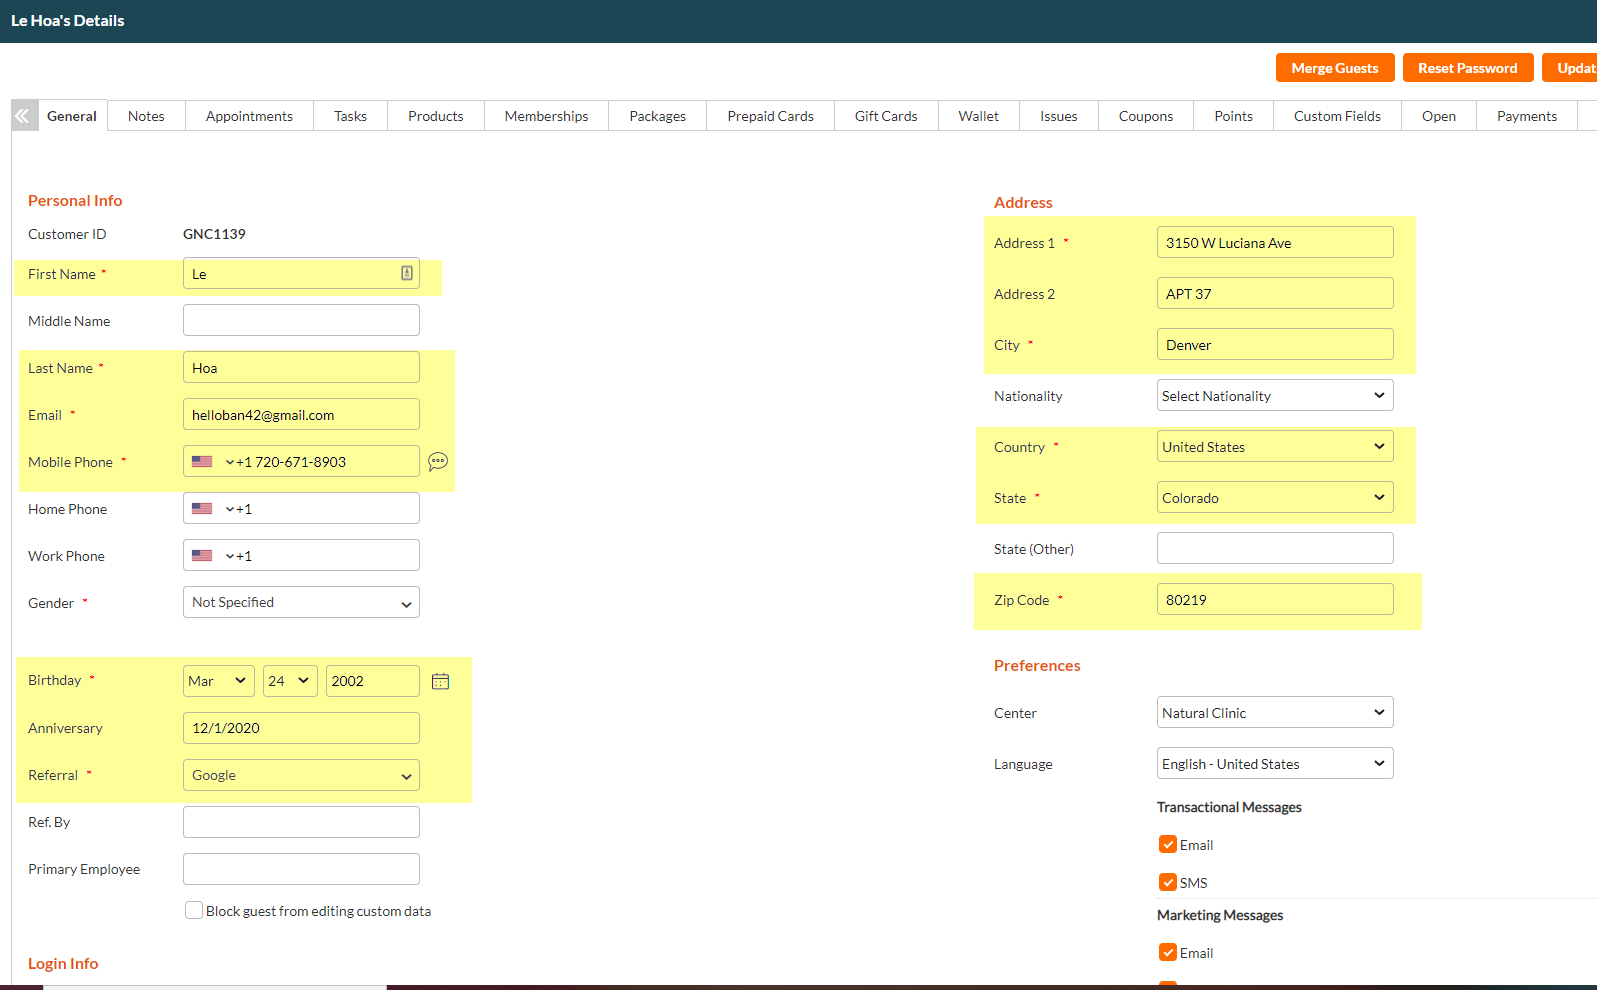
- GENERAL tab has all yellow fields completed an no dummy information (ie 000 in the address1 field)
- If the client has "000" in the address, an incomplete address or an other incomplete information in the above tab, ask the client for the information needed before they go back for their service.
- For the Date of Birth, only the month and day is needed. You can add a fake year if the client is not comfortable giving out this information. Please inform the client "We will send you a birthday gift via email, you won't want to miss this:)".
- For the Date of Birth, only the month and day is needed. You can add a fake year if the client is not comfortable giving out this information. Please inform the client "We will send you a birthday gift via email, you won't want to miss this:)".
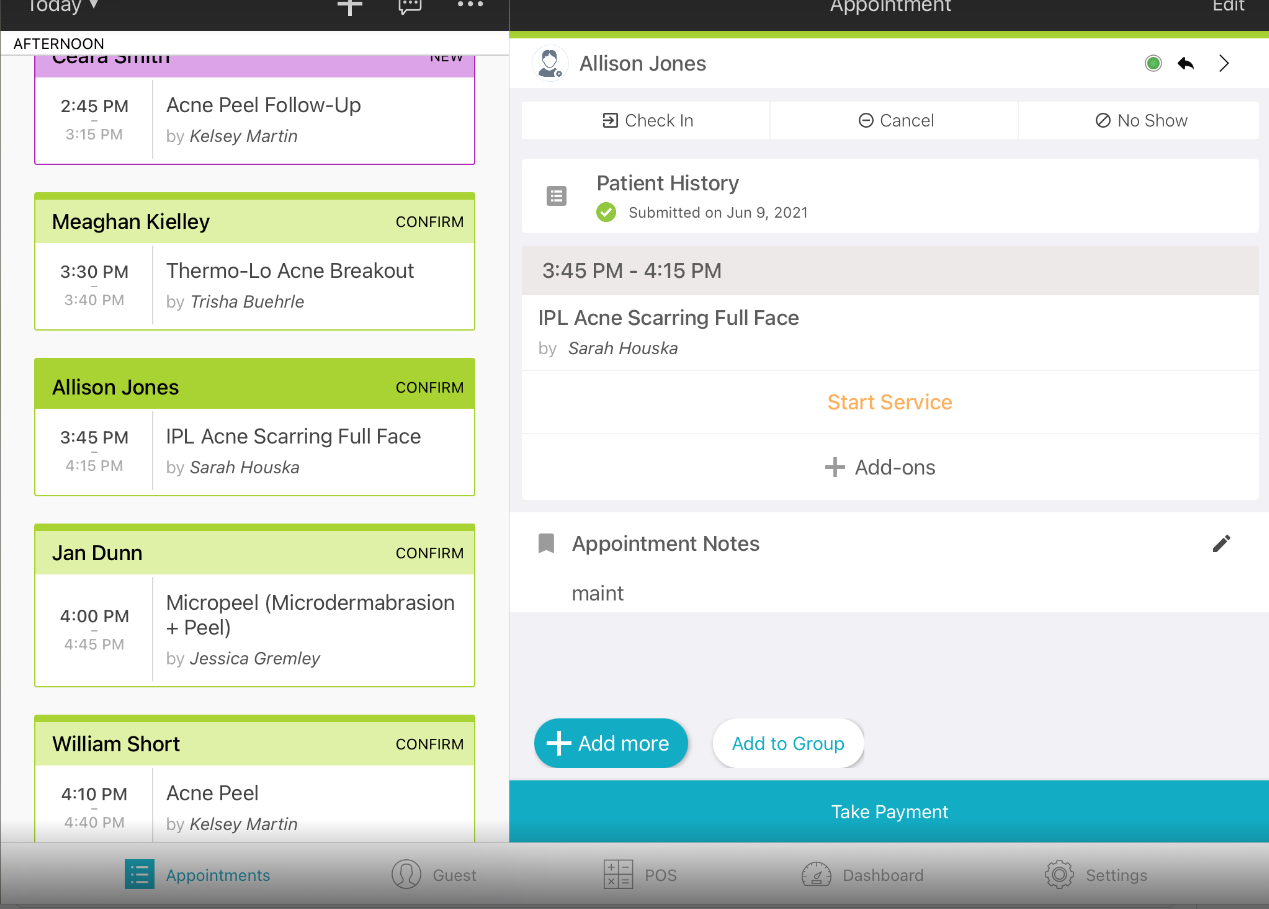
- Navigate back the the Zenoti Appointment Book, check the icons on the appointment to see if there are any "Critical Alerts" indicated by an orange triangle with an exclamation point.
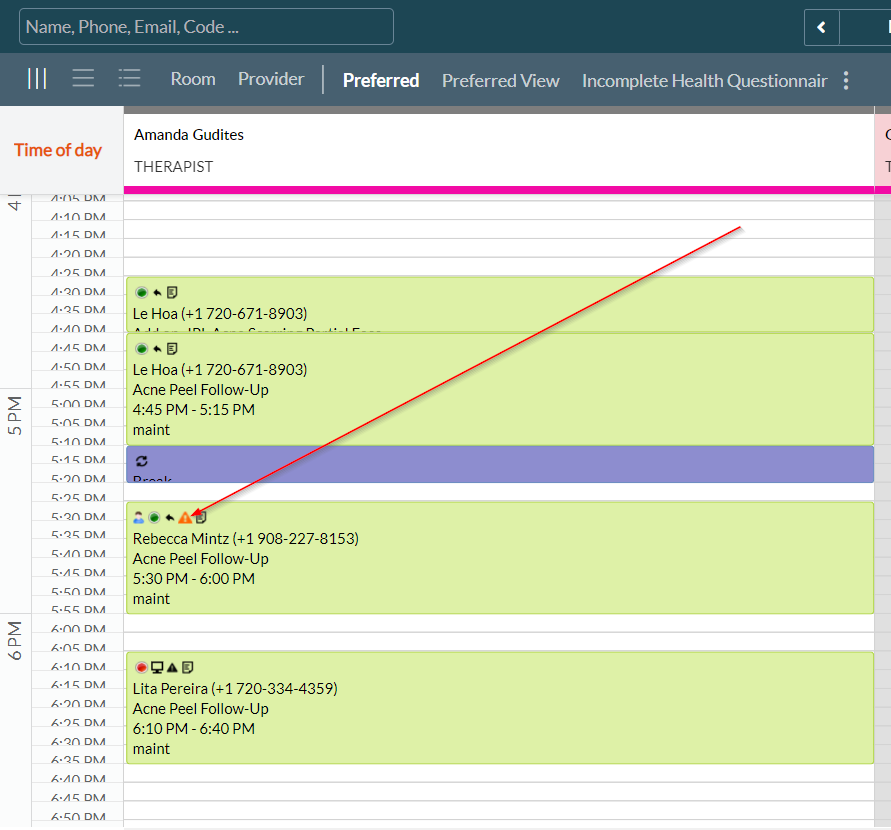
- If there are Critical Alerts, grab the iPad, and check to see what consent forms need to be signed by clicking on the guests name. (Please note that there may be a critical alert to complete a consent for a service not being done that day. If this is the case, ignore the alert and do not have the client complete the consent)
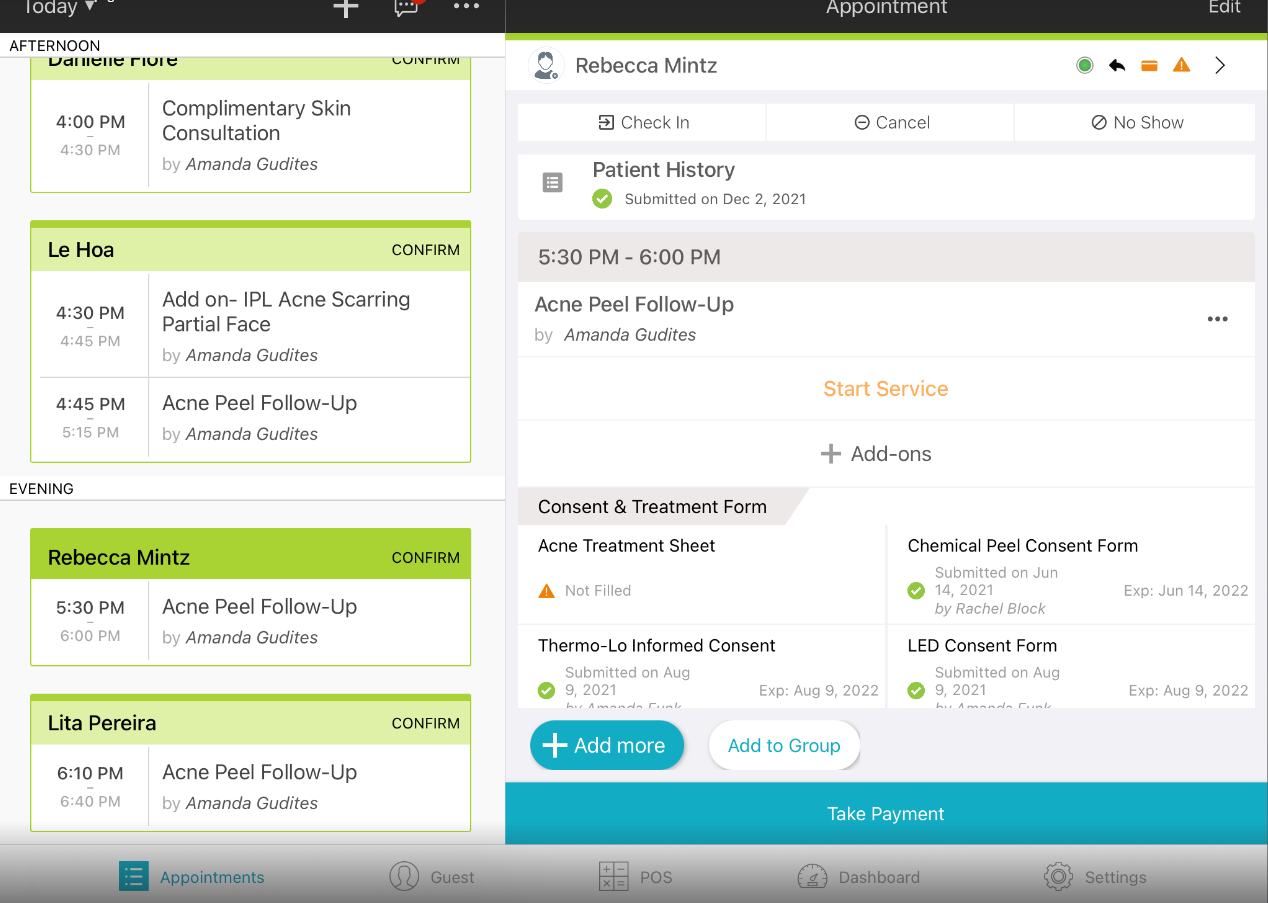
- On the iPad, check to see that the Patient History has a green check mark. If it is a orange triange, have the client complete the Patient History, sign and SAVE.
- Have Client fill out any applicable forms on iPad (See 'Filling out forms on iPad')
- Inform Client the Esthetician (Name) will be with them shortly

