
 24
24
1. Keap Sales Reports must be cross-referenced prior to shipping any orders to check for un-synced orders.
2. USPS does not pick-up on holidays or weekends.
3. All shipping labels are to be applied to packages neatly without folds or being applied to the packaged crooked. This is a reflection of our business. If a shipping label is crooked it looks sloppy. This is not the image we are looking to portray. Every detail matters.
4. New Online Acne Program client's orders are packaged in the white 12x9x4 corrugated boxes with crinkle cut paper and a Welcome card.
5. Check for quantities for each product for more than 1.
6. Check off each product on the packing slip after you have scanned each barcode.
7. If the order is $300 or more, add insurance. Apply an insurance amount of 70% of the order total.
Task
-
- Log into to ShipStation
-
- Click on Order tab to see orders that need to be shipped
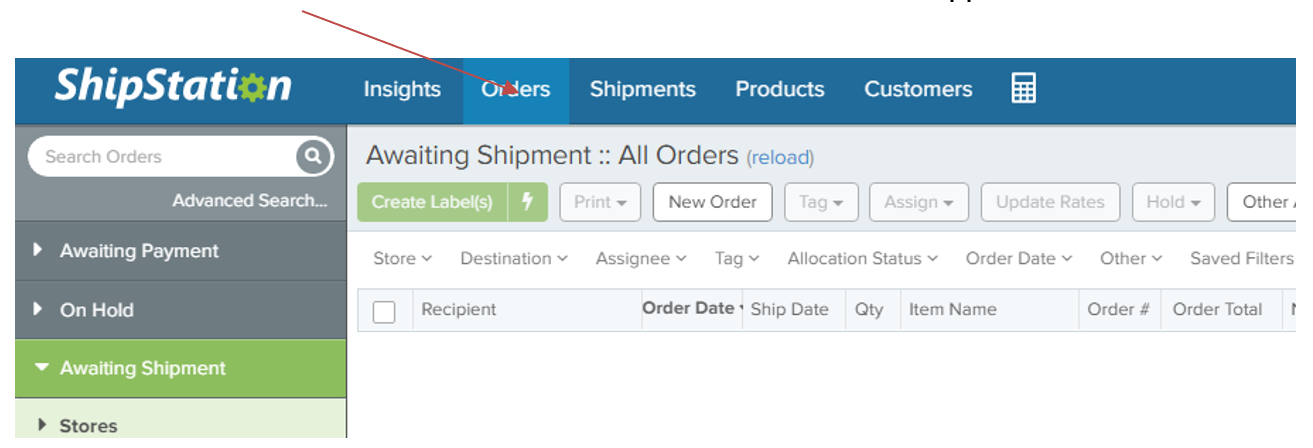
-
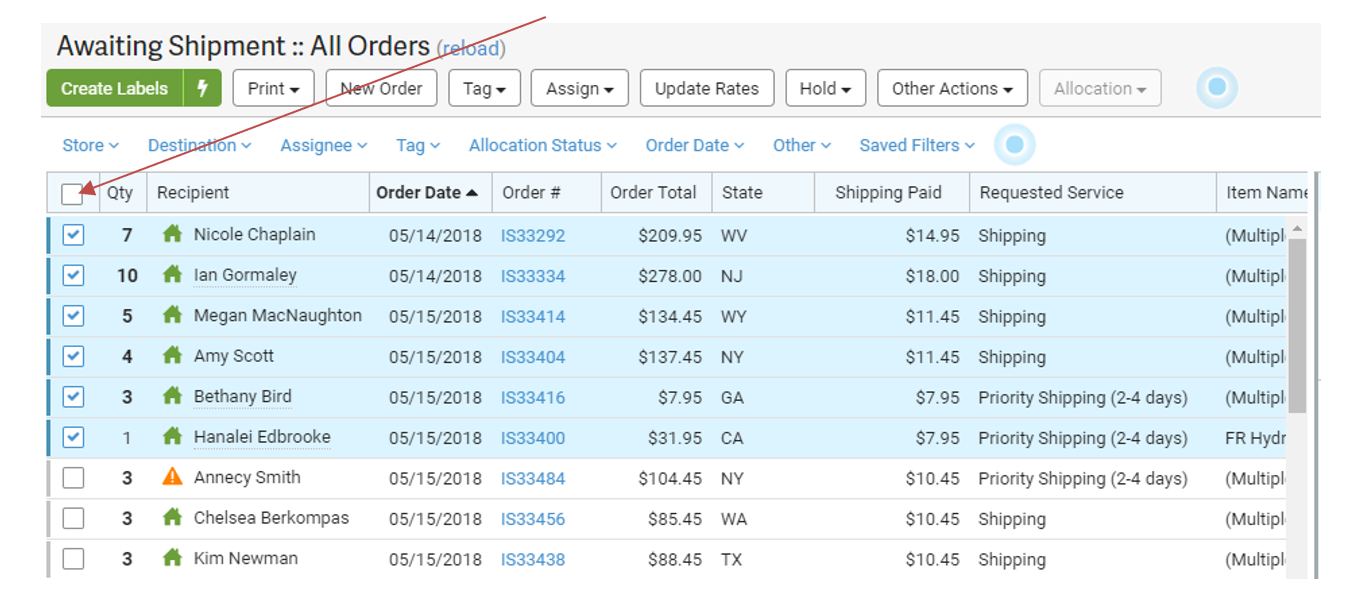
- Check Recipient “Client” box
- To print all packing slips at once , clicks ALL boxes
- Check Recipient “Client” box
-
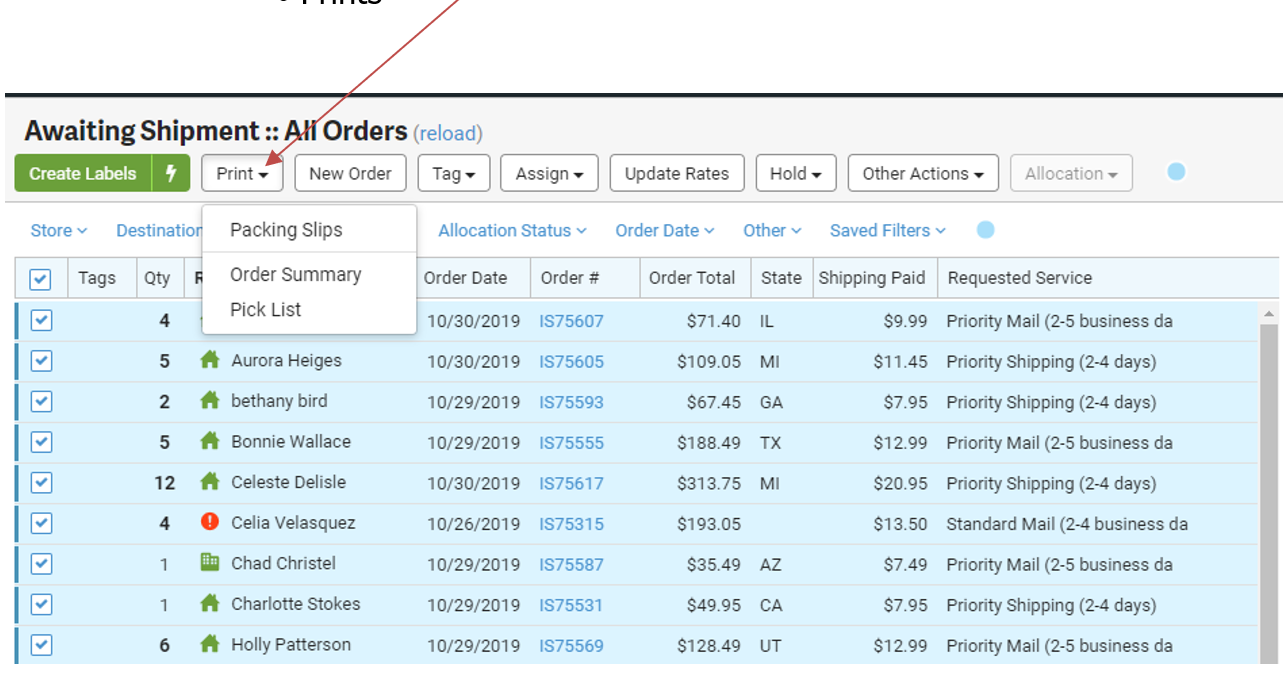
- Select Print Dropdown-
- Click ‘Print packing slip’
- This will print off of the Zebra
- Select Print Dropdown-
-
- Pull products to be shipped from shelf
NOTICE: be sure to watch for quantities great than 1 in ShipStation. To help with this, circle the number for any product that has more than 1
- 6. If sending an Online Acne Program Clients First Package, pull the plain white 12x9x4 corrugated box
- Add large packing bubbles to box if loose
- Add packing slip to box, underneath the card
- Neatly arrange products in the box
- Fill the bottom of the box with brown crinkle cut paper halfway
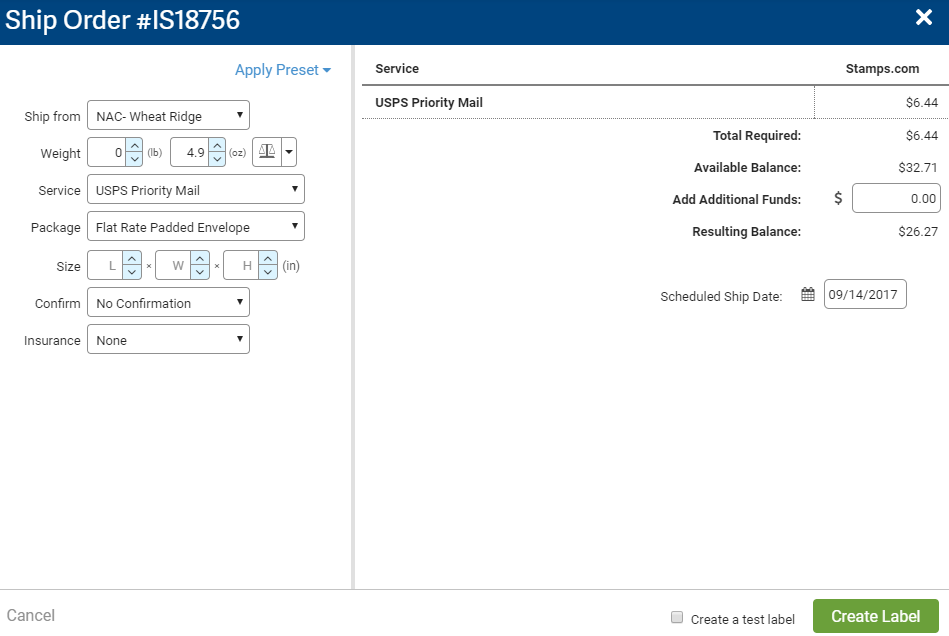
- Select Package Type using the drop down box USPS Priority Mail
- 7. If sending any other type of order, Select appropriate “Package”
- 8. If sending more than 1 item in Colorado, choose “Flat Rate Padded Envelope.
- 9. If sending under 1 lb in Colorado, choose “Thick Envelope”
*if the order is more than 10 items or so, you may need to ship in an unmarked box or Flat Rate Priority Box. If this is the case, choose the corresponding type of Package.
-
-
- If sending outside of Colorado, choose “Flat Rate Padded Envelope”
-
- 10. If the BOLD total is over $300, Select ‘Insurance’ Dropdown
11. Select _____________
12. Apply insurance amount of 70% of the order total
- 13. Select ‘Create Label’
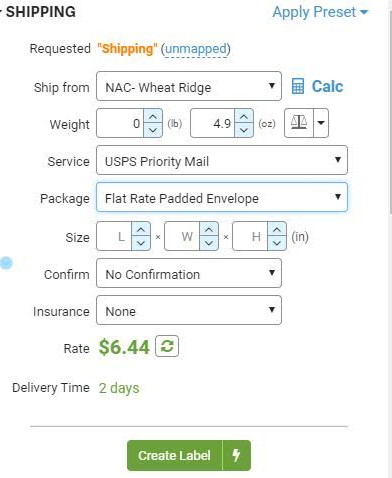
- 14. In the next screen, Select ‘Create Label’
- 15. Choose appropriate package
- 16. For Priority Mail, “Priority” Flat Rate Padded Envelope or Box
- 17. For First Class Mail, 6x10 plain white bubble mailer
- 18. Apply shipping label to package
- **Do NOT apply the label crooked or out of place**
- 19. Tighten & Apply packing tape to flip-top lids AND bubble wrap the following products
- Glass bottles
- ALL Toners
- Hair products
- 20. Stuff mailing package and seal securely
21. Place package in the mail bag to bring down to the loading dock

