
 26
26
CREATING & PRINTING BEFORE AND AFTER PHOTOS
Task
Esthetician Requests Before & After Photos of Client, the Back Office Admin:
-
- Navigates to Dropbox
-
- Navigates to ‘Client Photos 2’
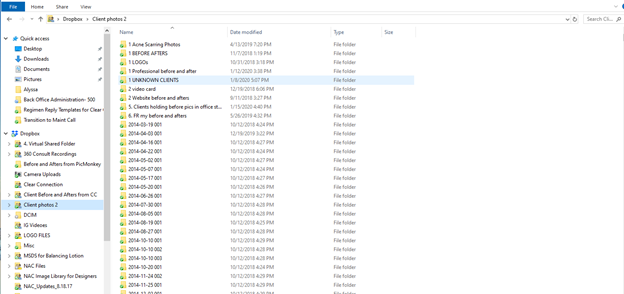
3. Scrolls to correct client folder or search client name in search box
4. Double Clicks on client folder
5. Clicks on Photos (Right, Left, and Front) with earliest date stamp and most recent date stamp
Note- there should be 6 photos in all that you will be editing. Before Right, Left, & Front and After Right, Left, & Front
6. Selects individual photo to edit
7. Clicks on photo>>right click mouse
8. Scrolls down to 'open with'
9. Selects 'paint'
10. Selects 'resize'
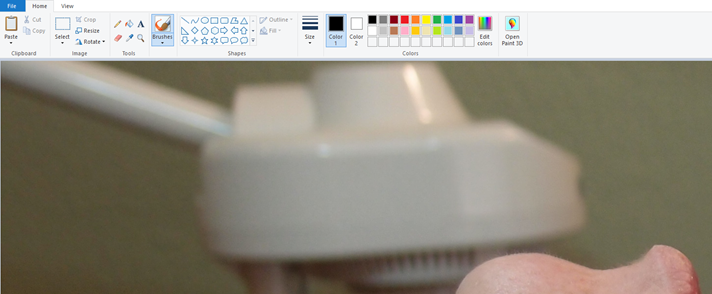
11. Enters '30' for Horizontal & Vertical
12. Clicks 'Ok'
13. Enters '70' for Horizontal & Verticl
14. Clicks 'Ok'
15. Clicks on 'Select">>'Select All'
16. Selects 'Crop'
17. Clicks left button on mouse >> crops photo to show only face
18. Clicks 'crop' again once the area is selected
19. Selects File>>Save as
20. Enters file name: example (before front or after right)
21. Navigates to Client Folder>>Save
22. Repeats steps for each before & after photo
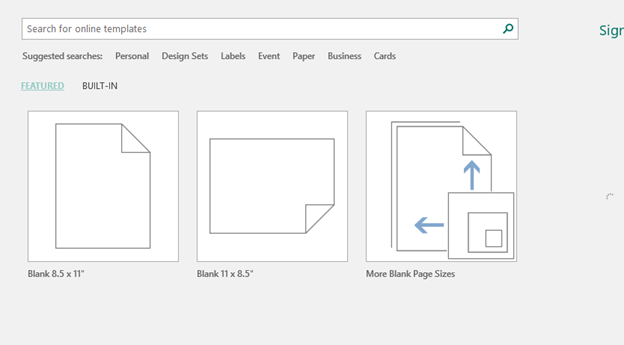
23. Opens 'Publisher' in search
24. Selects Horizontal 11x8.5
25. Navigates to client folder once photos are edited and saved
26. Copies before & after photos
27. Drops them onto the publisher template
28. Arranges before photos on top of page
29. Adds text box- Top Left with 'Before-Client's Name'
30. Arranges after photos on the bottom of the page
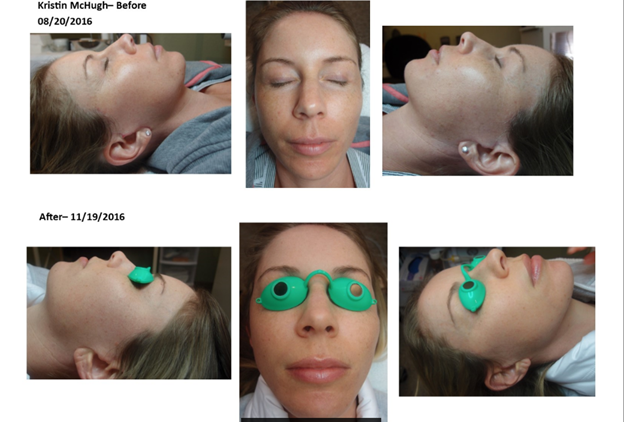
31. Clicks file>>save as>>browse
32. Enters file name: Example: Before & After - Client Name
33. Navigates to Client Folder
34. Saves in Client Folder as JPEG format
35. Prints Color Copy off canon ip7200 printer
-make sure paper type is set to glossy photo paper
36. Places client photo into client chart

